Coils 101: What You Need To Know Before You Build Your First Coil
Coil Building for the Beginner Modder:
What You Need & What You Need to Know Before You Build Your First RBA Coil
So you have finally decided it is time for you to try your hand at using a rebuildable atomizer or RBA. In this tutorial we will go over what you need and what you need to know to build your first coil. Before we get into the finer points, we want to let you know that there are some risks associated with coil building, like short-circuiting.
When you do get down to your first coil build, please exercise caution and follow the steps in this tutorial to ensure that you are building coils and vaping in a safe manner. Please DO NOT build if you don’t have an ohmmeter or multimeter.
The Benefits of RBA Rebuilding:
- Bigger cloud production
- Customize your build to your preferences
- A cheaper alternative to regular atomizers
- Amazing flavor production
What You Need:
- Multimeter or Ohmmeter (to check the resistance (ohms) of your coil)
- Screw Driver (to use to adjust the screws on your RBA)
- Drill Bits (to wrap your coil on) or a Coiler Jig– for easier wrapping
- Tweezers (ceramic-tipped is great, but regular ones are okay too)
- Wire Cutters or Nail Clippers
- Wicking Material (we recommend Organic Japanese Cotton)
- Choice of Wire (Kanthal A1 or Nichrome N8 is perfect for a first build)
- RBA & Mech Mod of choice (our Caldera on our PELE as an example)
- Needle Nose Pliers
- Your favorite e-liquid
Your Wire:
The choices of wire that you can use to achieve your best vape build are vast, but most of the time we recommend that you use either Kanthal A1 or Nichrome N8. You will have different size options between these two types of wires, but during your learning stage try to stay between 22-28 gauges. For this tutorial we will use Kanthal A1 at 26 gauge.
Other Wire Types:
- Ni200 Pure Nickel (used for temperature control with rDNA 40 devices like the LAVATUBE 3)
- Flat Kanthal
- Vapor Donut (mainly for flavor production, not much vapor)
Your Wick:
Wicking material is what you need to hold your favorite e-liquid and draw it up to your coil build so that it can vaporize it for your enjoyment. There are different types of wicking material available on the vaping market, but we recommend Organic Japanese Cotton; for the one of the best wicking, vapor and flavor production that you can get. Organic cotton is great too because it hasn’t been bleached, colored or exposed to any other chemicals.
Other Wick Types:
- Silica
- Ekowool
- Cellucotton Rayon
- Stainless Steel Mesh
VOLCANO Vaper Pro Tip: With coil builds, the terms nano, micro and macro refer to the inner diameter of the coil. This can vary from person to person, but a general rule is:
Nano: A coil wrapped on a 1/16 drill bit and smaller
Micro: Higher than a 1/16 drill bit, but smaller than a 1/8th drill bit
Macro: 1/8 drill bit & higher
Let’s Get To Building
First, if you do not have an ohmmeter or multimeter, please do not attempt to build. You cannot build safely without having an ohmmeter to check the resistance/ohms of your coils.
But if you do have an ohmmeter and have all of the other tools, you are ready to make your first coil. For this example, we are using kanthal A1 at 26 gauge and we are going to build dual coils on a three-post RBA like the Caldera RDA.
How To Build Your First Coil:
Measure out 6 inches of the Kanthal A1 26 gauge wire

1. Pick out your desired drill bit size from your set (3/32 - 1/8) or pick the same post size from your Coiler Coil Jig
2. Take your wire and with your thumb and pointer finger hold about 2 inches against the part of the drill that is grooved (you are going to be wrapping on the smooth side of the bit)
3. Take the rest of your wire and start wrapping it around the bit:The first loop is the most challenging, but just take it slow and wrap your coil by placing the wires as close together as you can.

1. Keep wrapping until you have counted 7 wraps. Make sure that with your 7th wrap the leads (ends of the coil) face the same way.
2. If any of your loops overlap, you will need a new length of wire and wrap again.
3. Wrap a second coil of 7 wraps.

Grab your Ohm Meter & Screw your RBA onto it

Attach your coils, one at a time to the posts of your RBA.
For a three-post RBA like the Caldera, the center post is always the positive with the outer posts being negative.Most RBA’s nowadays have holes drilled into the posts for easier attachment of coil builds.

1. Thread the longer lead of your coil into the positive post, make sure it is not touching the post but is not so far that it would touch the inside of your RBA’s cap.
a. If it would touch either the post or the cap, this could lead to short-circuiting and you do NOT want that to happen.
2. Then, take the short lead and thread it through the negative post. Again make sure it does not touch the post or the cap. Once you are satisfied with your placement, tighten the screw onto the wire, enough that it is very snug but not too tight otherwise it may cut the wire.
3. On the opposite side of where this coil is placed, attach your second coil in the same manner. Once you have both wires in the positive post, go ahead and tighten the screw down to secure the wires.
Make adjustments to your coil placement using your needle nose pliers and make sure their placement is horizontal.
1. You may need to unscrew the posts a little to adjust their placements.
2. Cut your leads. Once you are satisfied with their positions, go ahead and trim the leads of your coils, as close as possible to the post. If a little bit of your lead is still sticking out even after you have trimmed, take your needle nose pliers and use them to bend the excess lead up and flush against the post.
a. This is necessary to avoid the leads from touching the cap, which would also lead to a short-circuit.
Check the Resistance of Your Coil Build

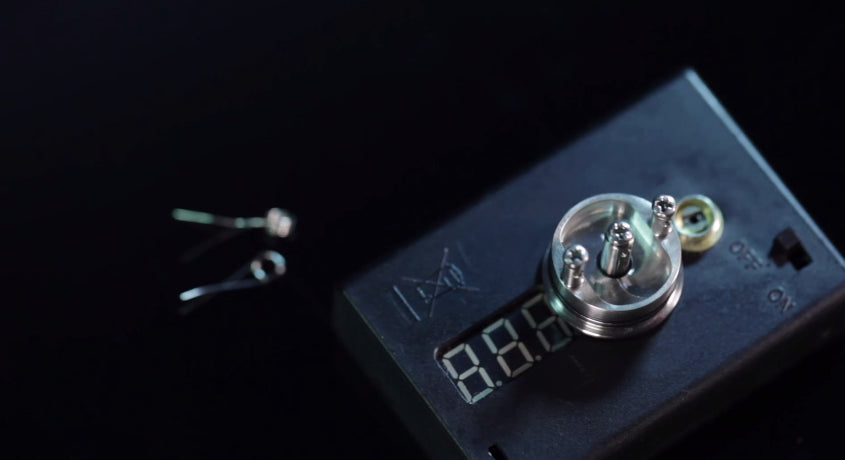
With your RDA attached to your ohm meter, turn it on, it should read around 0.5ohms (it can vary from between 0.4-0.6 depending on your RBA) (the image above is just an example).
If it reads correctly, move on to the next step.
If your ohmmeter doesn’t read it correctly—say it read instead 0.2 ohms or below (due to cross-wires / short-circuiting), there’s an issue that you need to fix.
1. Check to make sure that your post screws are on tight
2. Make sure your coils aren’t touching the posts or the deck itself
3. Double check that you screwed on your RDA correctly onto the ohmmeter
If the steps above correctly your problem, move to the next step. If not you will need to start from the beginning. If the problem persists after a second build, your ohmmeter or RDA may have an issue.
Keep In Mind:
Lower resistance levels will equal a hotter vaper and are recommended for more advanced users who have a better understanding of Ohm’s Law.
Learn about Ohm's Law & How It Applies to Your RBA & Mech Mod
Pay close attention to the resistance level of your RBA before you attach it to your mech mod with a battery as operating with a resistance level that is too low is dangerous.
Attach to Your Mech Mod, Test Fire & Eliminate Hot Spots

1. Now take your mechanical mod of choice, the Tephra 1 and LAVATUBE 3 are great to start with, and screw your RBA onto it. Pop in a fully charged 18650 LiMn battery and now its time to see how your coils fire.
2. Give your build a few pulses by pressing the activation button. Pulsing preps your coils for longer firing. Now go ahead and hold down the activation button until your coils glow.
3. Then let go of the fire button, take your pliers and gently pinch your coils together until they glow evenly starting from the center out.
4. If your coils glow from the outside in, or have any uneven “hot spots” that fire before the center, keep pinching your coils until you find the correct placement that has them glowing evenly from the center and out.
Wick Your Coil Build

Grab a piece of Japanese cotton (or whatever wick you’d like to use), about 3 inches in length and roll one end to a point between your fingers. Take the pointed end and thread it through the middle of your coil, gently tug it through from the other side. If it is too hard to pull through, you have too much cotton and will need to remove some (too much cotton will choke your coil and will hinder vapor production). Pull it through until both sides look even.
1. Repeat this step with the other coil.
2. Now trim the ends off of the cotton so that each side is about long enough to fold over the RBA.
3. Go ahead and stuff the ends of the wick into the juice well underneath the coils. Try not to cover the coils too much otherwise no air will get to the coils. No air = no vapor.

Test Your Coils One More Time
After wicking, there is a great possibility that all of the movement has caused your coils to jiggle out of place. Check and make sure that the post screws are still on tight and then screw it back onto your ohmmeter to check its resistance. It is possible that the resistance may have changed a little bit, around +/- .2 ohms, but this is okay. If everything checks out screw your RDA back onto your mech mod.
Prime & Vape!

Now grab the best e-liquid from your collection and carefully drip it onto your coil and wick build. Make sure that you fully saturate the cotton and also wet your coils. Once you are satisfied with the amount of e-liquid on your build, replace the cap, attach your favorite drip tip and vape away!
You have just built your first dual coil build at a rating of 0.4 – 0.6 ohms for your rebuildable atomizer. Great job VOLCANO Vaper!
Prefer to watch a video?
DISCLAIMER:
Mechanical mods and rebuildable atomizers are for advanced vapers only. They should not be used by anybody without the proper knowledge and research conducted on how to rebuild in a safe manner. All buildable atomizers and mechanical mods should always be tested carefully with a multimeter or ohmmeter before being used. Please build and use at your own risk.


