The DNA 200 Guide: How to Create & Upload Preset Profiles Using EScribe
The DNA 200 Guide: Make & Upload 8 Preset Profiles Using EScribe
EScribe is the software built by EVOLV for the DNA 200 chip that is located in your DNA 200 box mod. With this innovative software you can configure the settings of your device to your exact preferences. As discussed in our earlier tutorials, EScribe is currently only available in Windows and we are still waiting on their Mac version.
With our previous posts, we done a brief overview of EScribe and its features and we have also shown you how to create and upload custom screens for your device. This time around we are going into the specifics of creating custom profiles for your DNA 200 device with the help of EScribe.
Your DNA 200 box mod comes with 8 profiles that you can customize to match every tank and RDA you have in your vape collection. After some configuring, this incredible feature will allow you to pop on your favorite tank, choose its set profile, prime and vape!
So let’s get to the customization. Grab your DNA 200 device, plug it into your computer and load up EScribe.
The General Tab

The “General” tab is the starting point for your EScribe program. By clicking on “Get Information” you can get all of the detailed information about your DNA 200 device. With “Restore Defaults” it will set your device back to factory settings.
The “General” tab is the most important aspect of EScribe as it holds all of the possible profiles that your device can have. With EScribe, you can store up to 8 different profiles that each match a specific RDA, coil build, wire type or tank that you use.
You can upload your own customized screen to each profile for easier identification of your setting when using your device. But more importantly, each Profile tab allows you tweak the settings for different specifications like watts, temperature, resistance, heating capacity and etc.
This great feature essentially takes the guesswork out of your vaping, you no longer have to manually adjust for a specific temperature or wattage setting whenever you switch out RDAs, tanks or coil builds. With EScribe’s set profiles all you need to do is choose the Profile you want to use and that’s it.
Setting Profiles to Temperature Control Coil Builds
In order to use Temperature Mode you must have a coil build made from Pure Nickel Ni200, Titanium or Stainless Steel. To do so you need to do a little research on the proper CSV file settings for the “Material Profile”.
Select “Custom” under “Coil Material”.
For this example we will be adding an Ni200 Profile, for Nickel Temp Builds.
This will open the Material Profile window, and then follow the steps below:
Click on Custom Materials
This will open your Internet browser to EVOLV.com, which will then lead you to Steam Engine’s coil build calculator, the Wire Wizard.
Your settings will differ depending on the type of Nickel wire (or any temperature control wire) that you use, the type of coil build you like (single, Clapton, etc), gauge and the number of wraps.
Before you add in the specific numbers for the builds and coil you use, just make sure that you click on the “DNA200” button listed under Temperature Control results.
Now input the settings you need for your specific builds following Steps 1-4 as shown in the image below.
You will notice when you change the settings the numbers in the blue Results box and the Temperature Control results box will change.
After you are satisfied follow Step 5 by clicking on the Download TFR table as CSV button. After you download the file to your computer go back to EScribe.
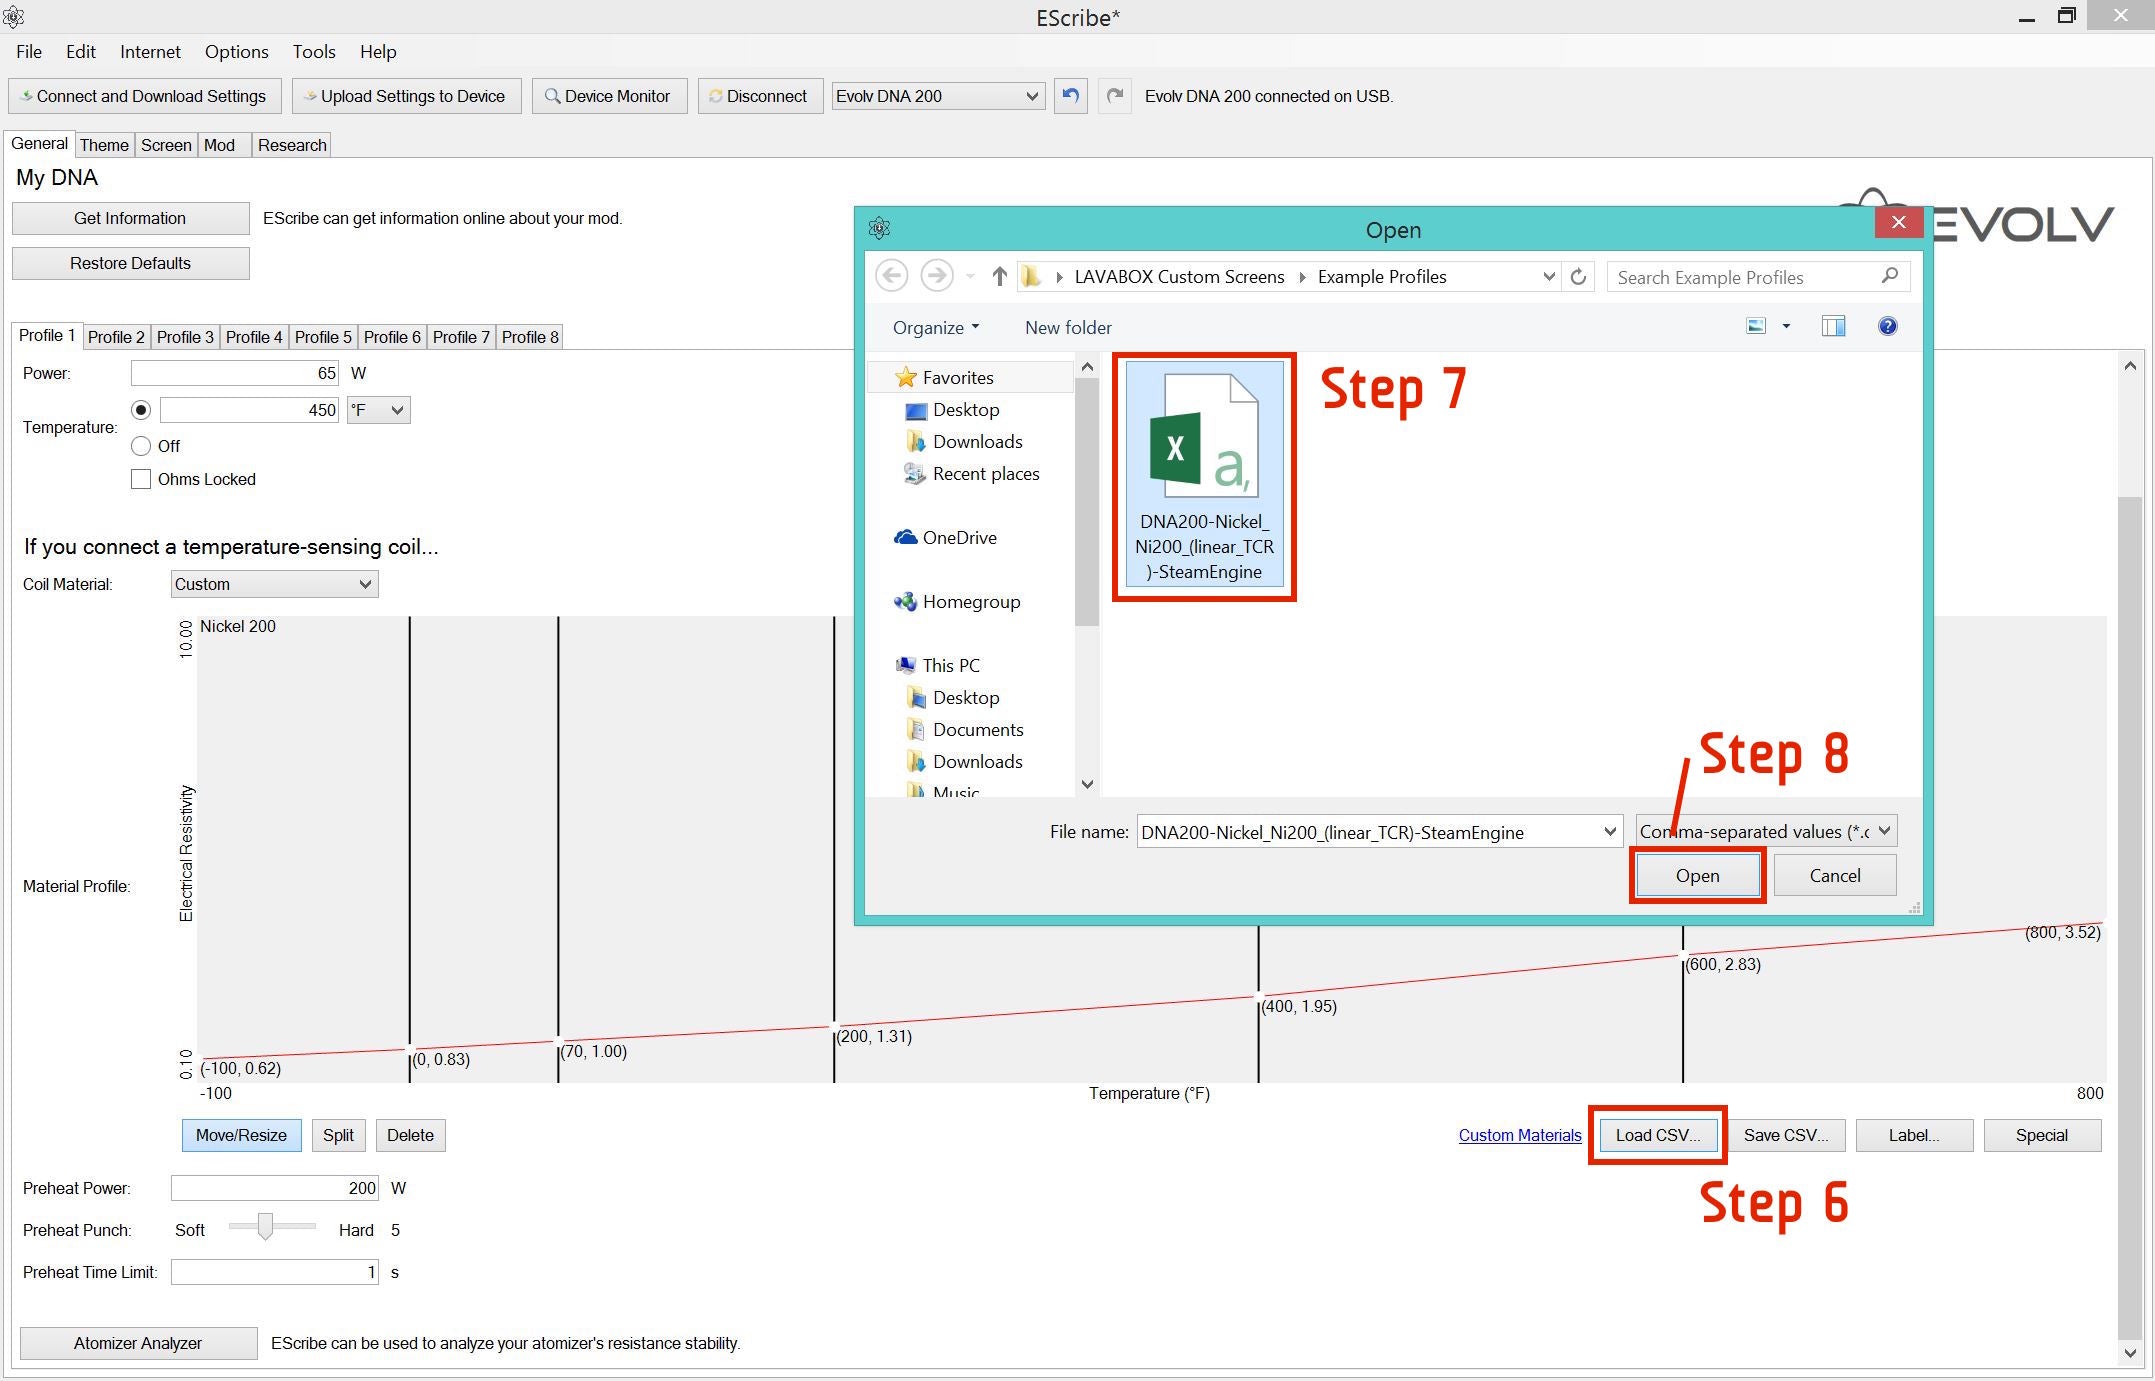
Follow Steps 6-8 as shown in the image below.
After you have completed uploading the CSV file, you will know that the CSV uploaded correctly if the title on the graph matches the name of the CSV file that you downloaded from Steam Engine.

To finish the settings, input your preferred Wattage setting, Temperature Cut-off, Preheat Power, Preheat Punch and Preheat Time Limit as shown on Steps 9-10.

Follow Steps 1 – 10 for the other 7 profiles that you can customize to your preferences.
After you are done setting your profiles, click on Upload Settings to Device to upload all of your settings to your DNA 200 device.
When this is complete, disconnect from EScribe, pop on your favorite RDA, choose the correct profile for your current build, prime and vape on!


