How to Replace the LAVABOX LiPo Battery The Easy Way
8 Easy Steps To Replace the LAVABOX LiPo Battery
You’ve had your LAVABOX DNA 200 for a little while now. It’s set up to your liking; you have the perfect profile ready for every RDA and tank that is in your collection. Everything is going great, but there will come a time when your battery may need a swap out.
Here is an easy to follow guide for you to follow to make the battery switch an easy one.
What You Need:
Phillips Screwdriver
Replacement LAVABOX Fullymax 900mAh 3S Battery
Step 1:
Take the screwdriver and use it to remove the grip from your LAVABOX.

Step 2:
Use the screwdriver and now remove the two long screws that hold the back plate on your device. Remove the back plate and you will see your old LiPo battery nestled inside.

Here is a closer look at the LAVABOX’s internals. You will see that there is a black pad that is attached to the LiPo battery to prevent battery rattle. (Keep its thickness in mind for later)

Step 3:
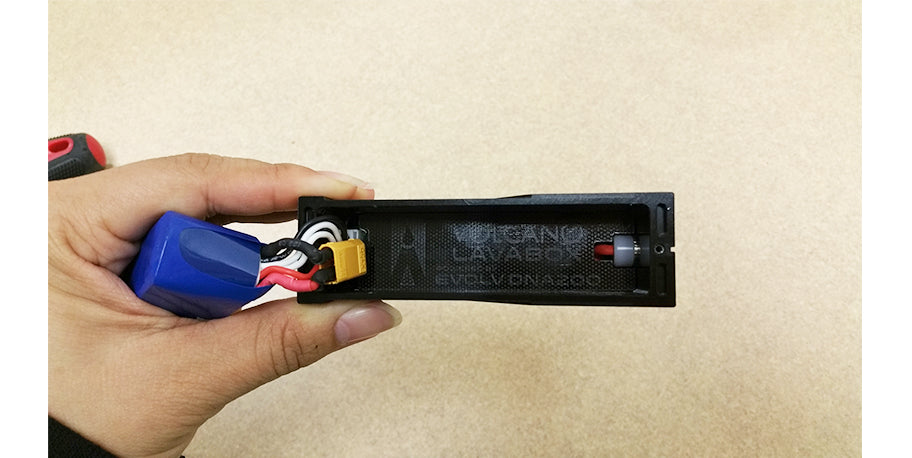
Pull out the battery and you will see the two connection points of the battery to the device itself. The replacement battery that you have and the old battery already has the JST-XH balance plug (white) and the 18 AWG power cables connector (yellow).

Closer view of the connectors and connection points, along with the VOLCANO & LAVABOX logos inside of the device.
Step 4:
Grab the yellow 18-AWG connector and carefully pull it out of the connection point. Use a slow wiggle motion to pull it free from the device.

Step 5:
The JST-XH balance plug is a little harder to get to since it is located behind the JST-XH plug. The white connector is a bit more of a challenge to reach, but try your best as it is very important that you pull the plug free from the connection point and DO NOT pull from the wires. The image below is showing the wires pushed aside to get a closer view of the white connector for reference (not actually pulling on it).

Here is a closer view of the connection points after the battery has been removed.

Step 6:
Grab your replacement LAVABOX LiPo battery and plug in the white JST-XH balance plug first (make sure you line up the metal connection points for a secure fit).
Then, take the yellow 18 AWG power cables connector (place negative with negative & positive with positive) and plug it into the connection point.

A view at the Positive and Negative sides of the connector and connection point.
Step 7:
Before you place your battery into the device, add a piece of thick foam mounting tape to the side of the device where the specs of the battery are printed in thin black lettering. Make sure that the width of the tape is thick enough that it creates a secure fit for the battery while inside the device (no movement at all). Doing so will prevent battery rattle while the device is in use.
If you don’t have any thick mounting tape, you can use some electrical tape folded in on itself so that it is the thickness that you need. Tape it onto your battery so it stays securely in its place.
Place the battery inside the device. Give your device a little shake, if there is no battery rattle move onto the last step.

Step 8:
Replace the back plate, secure with the two long screws. Then replace the colored grip (a perfect time to switch out colors) screw in securely, pop on your favorite RDA, turn on your device, choose your favorite profile setting, drip your favorite e-liquid, prime and vape!


